VRChat Protogen Avatar 3.0 Upgrade Tutorial
Update (2021-06-11): The latest version of the NKD Protogen model now contains 3.0 support out of the box, so this tutorial is no longer necessary when working with the latest version! This tutorial is now outdated but left as-is.
If you're working with the latest version of the model, then my notes page on the NKD Protogen has up-to-date information about setting it up and customizing it!
This is a tutorial about upgrading a VRChat avatar from the Avatars 2.0 to the Avatars 3.0 system (VRCSDK3), specifically about upgrading the NKD Protogen avatar to Avatars 3.0, though some of this tutorial should be relevant to upgrading any avatar to Avatars 3.0. As of the time of writing, the NKD Protogen avatar is only officially available as an Avatars 2.0 compatible project, which means that as-is, it's not compatible with Avatars 3.0 and its benefits unless you upgrade it yourself.
The Avatars 3.0 system comes with a variety of benefits, including the ability to do quick local testing of avatars without needing to upload it for every change, and a more powerful expressions menu, where in addition to having basic gesture buttons, you can add animation toggles and joystick-controlled animations. This is a big step up from the past system where every persistent animation could only be done through unlabeled hand gestures that the player had to hold.
This tutorial is intended for anyone from a first-time avatar creator to an experienced creator interested in making sure they aren't missing anything in the process. Feel free to message me on Discord (username: macil) if you have any questions about this tutorial! I'll try to update this tutorial to address any issues.
Project Setup
Assuming you're planning on working with the NKD Protogen avatar, then the very first step is to buy the base model from the creator. It costs about $40. (If you can afford VR, you can afford to support your artists! If you want to keep people doing professional work in the community, then it's good to support them.)
Once you've bought the model, you'll be able to download the "NKD_Protogen.rar" file. You'll want to extract it somewhere. (I recommend using 7-Zip to open it! It's free and open source software, and works on many file formats.)
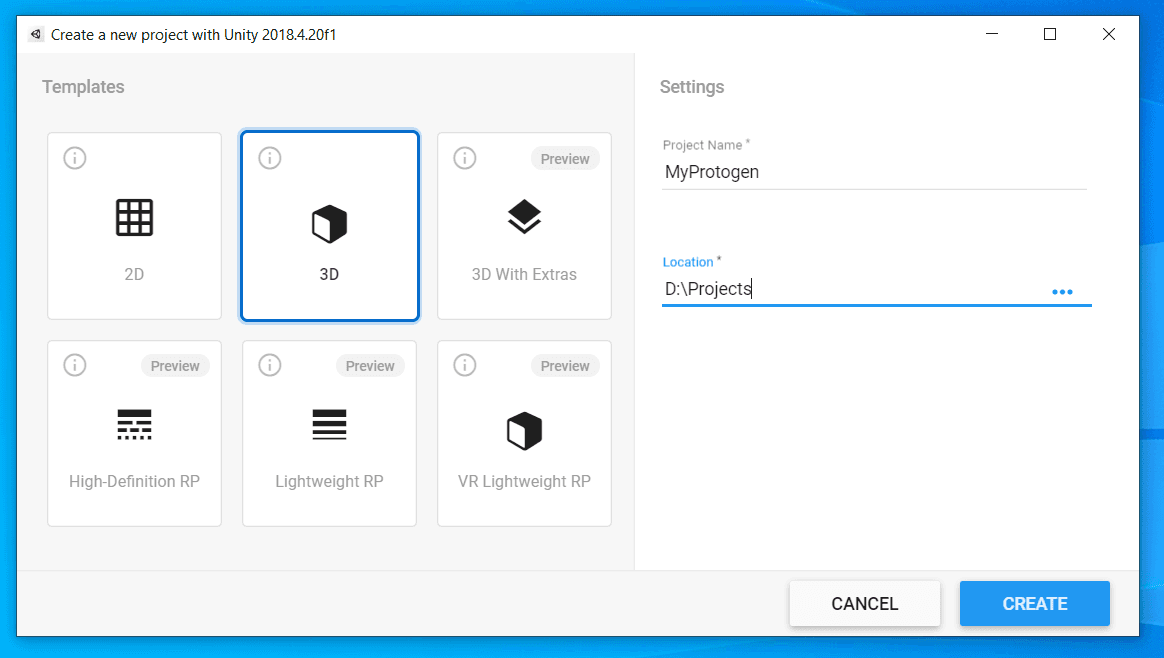
Next you'll want to create a new project in Unity. Don't try to re-use a pre-existing Avatars 2.0 project for an Avatars 3.0 project. Make sure you use Unity Hub to install the correct Unity version that the VRchat docs recommend. Other versions of Unity aren't compatible with the VRchat SDK. Don't try to use the latest Unity version. When you create a new Unity project, pick the "3D" option.
Once you have the project created, go to https://vrchat.com/home/download, pick "Download SDK3 - Avatars", open it, and then Unity will open a window asking what you want to import from the package. Leave everything checkmarked and press import.
The avatar's Gumroad page lists the other things the avatar depends on besides the VRChat SDK: Xiexe's Unity Shader and Dynamic Bones. Follow the instructions on that page to install Xiexe's Unity Shader. To install Dynamic Bones, you'll need to open the Unity Asset Store (Window -> Asset Store), search for "Dynamic Bones" and find the plugin by Will Hong, buy it for $20, and import it into your project.
Tip: If you're using Git with Unity for version control, open the file "Assets/Xiexes-Unity-Shaders-VERSION/.gitignore" in a text editor and remove the line "Textures/Shadow Ramps/Generated/" from the top of the file. That gitignore file is meant to stop the Generated directory from being checked into the Xiexes-Unity-Shaders repository, but you want that directory to exist within your own project's repository.
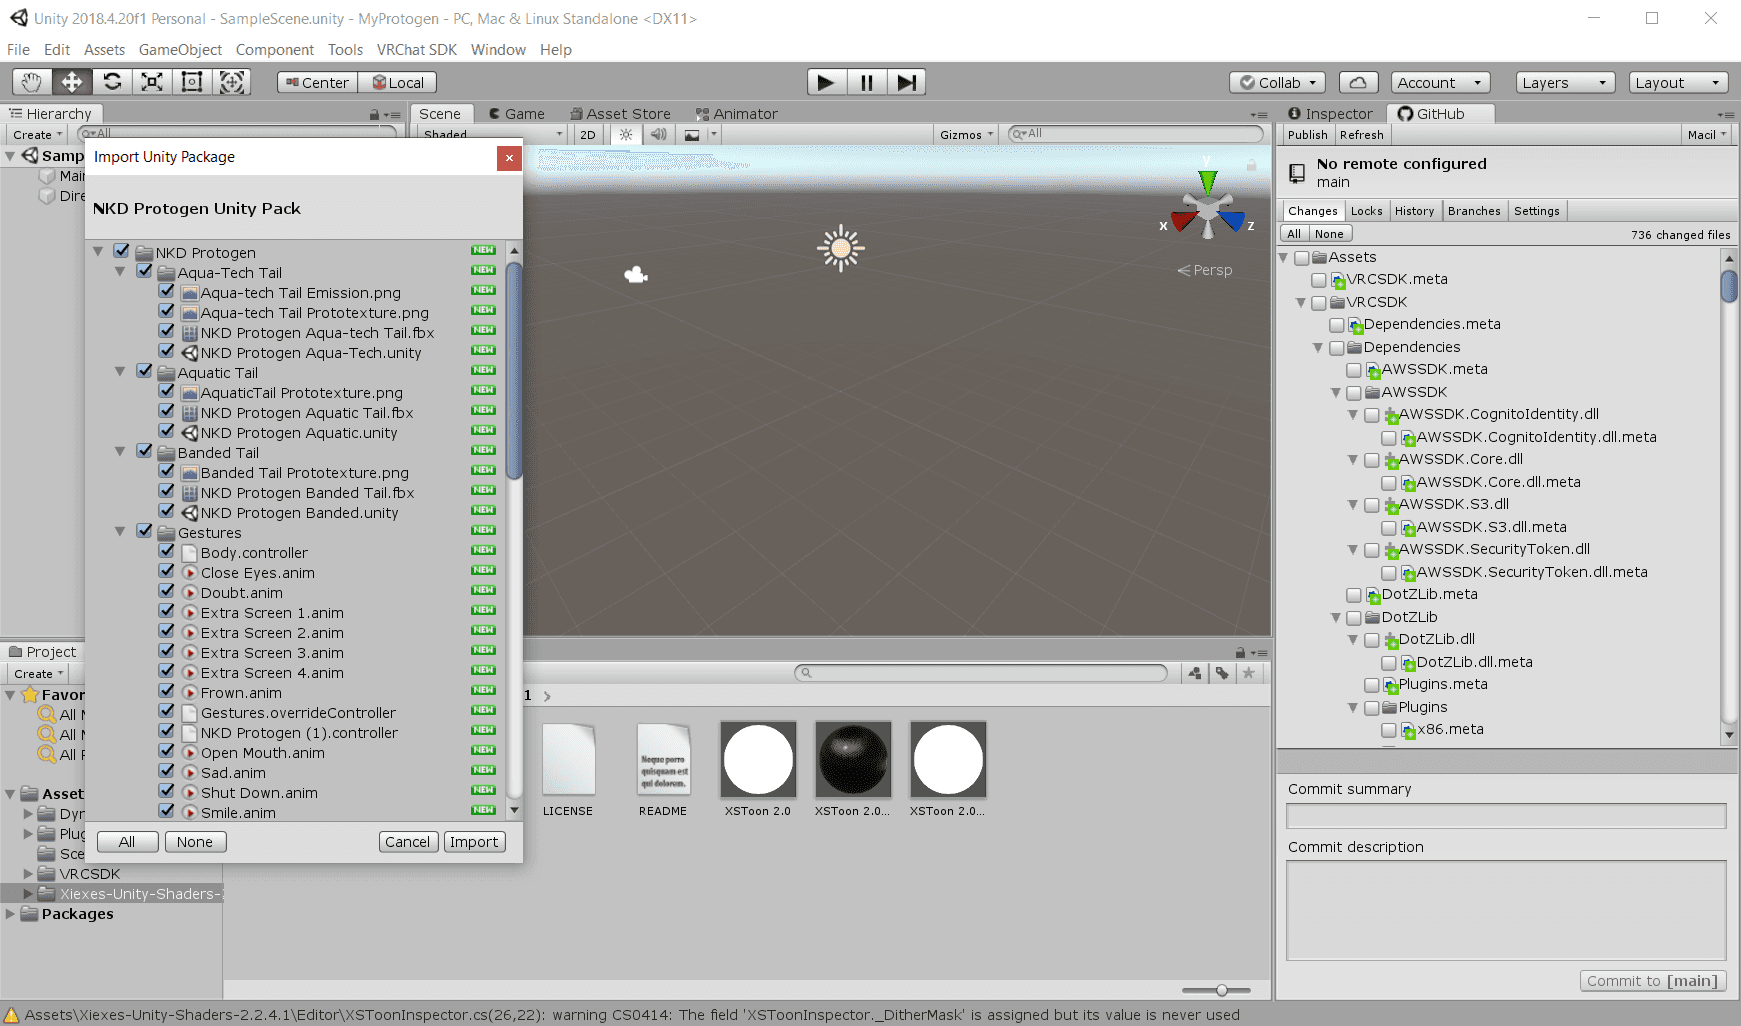
Now you want to go into the extracted files from NKD_Protogen.rar and open the "NKD Protogen Unity Pack.unitypackage" file. Unity will show the import menu. Import everything in it.
If you're working with a different avatar base or a pre-existing modified avatar, then instead of opening a .unitypackage file, you might need to copy your avatar's directory into your new project's Assets directory.
Tip: If you're using Git with Unity, then right now after you've imported anything without making any real changes yet is a good time to make a commit. That way the changes you make yourself will be more apparent and separate from the original imports in the git history after this point.
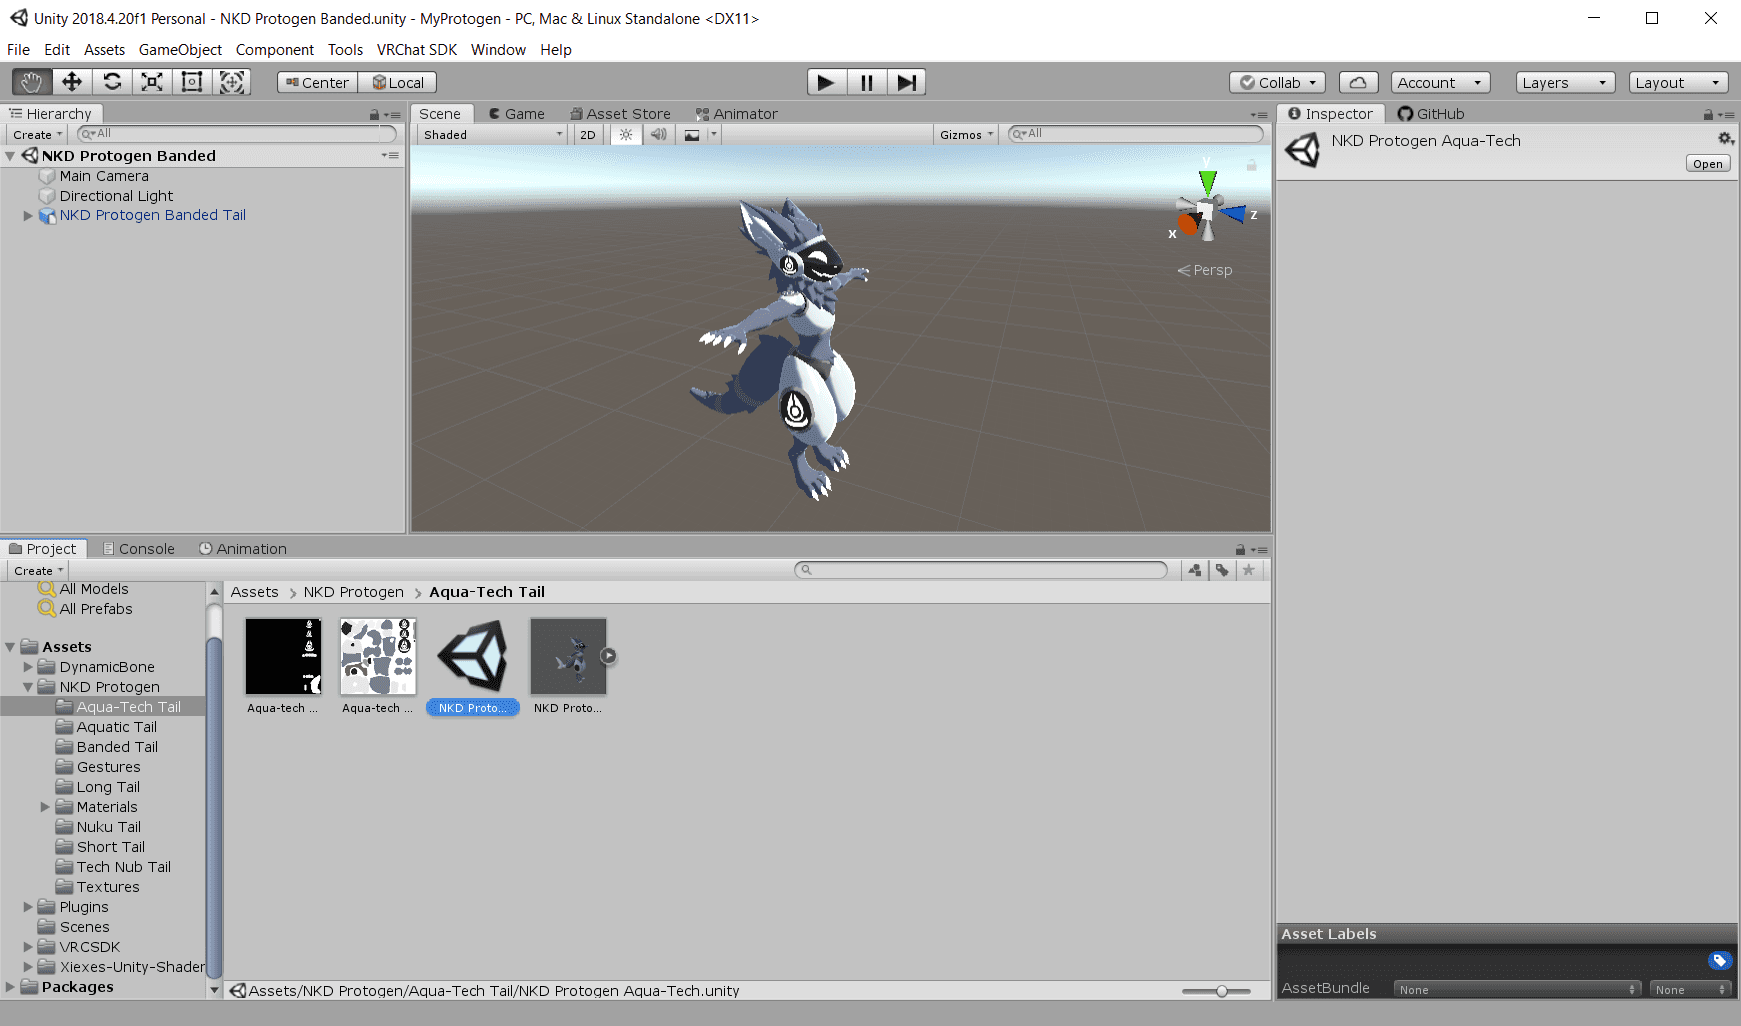
In the Project window at the bottom-left of Unity, open Assets -> NKD Protogen, and then double-click on the "NKD Protogen" Unity scene file in that directory. You should now see the protogen avatar in the Scene window in the center of Unity. (You may need to scroll in with your mouse wheel to get a good view. You can move the camera by holding right-click and then moving the mouse and using WASD.)
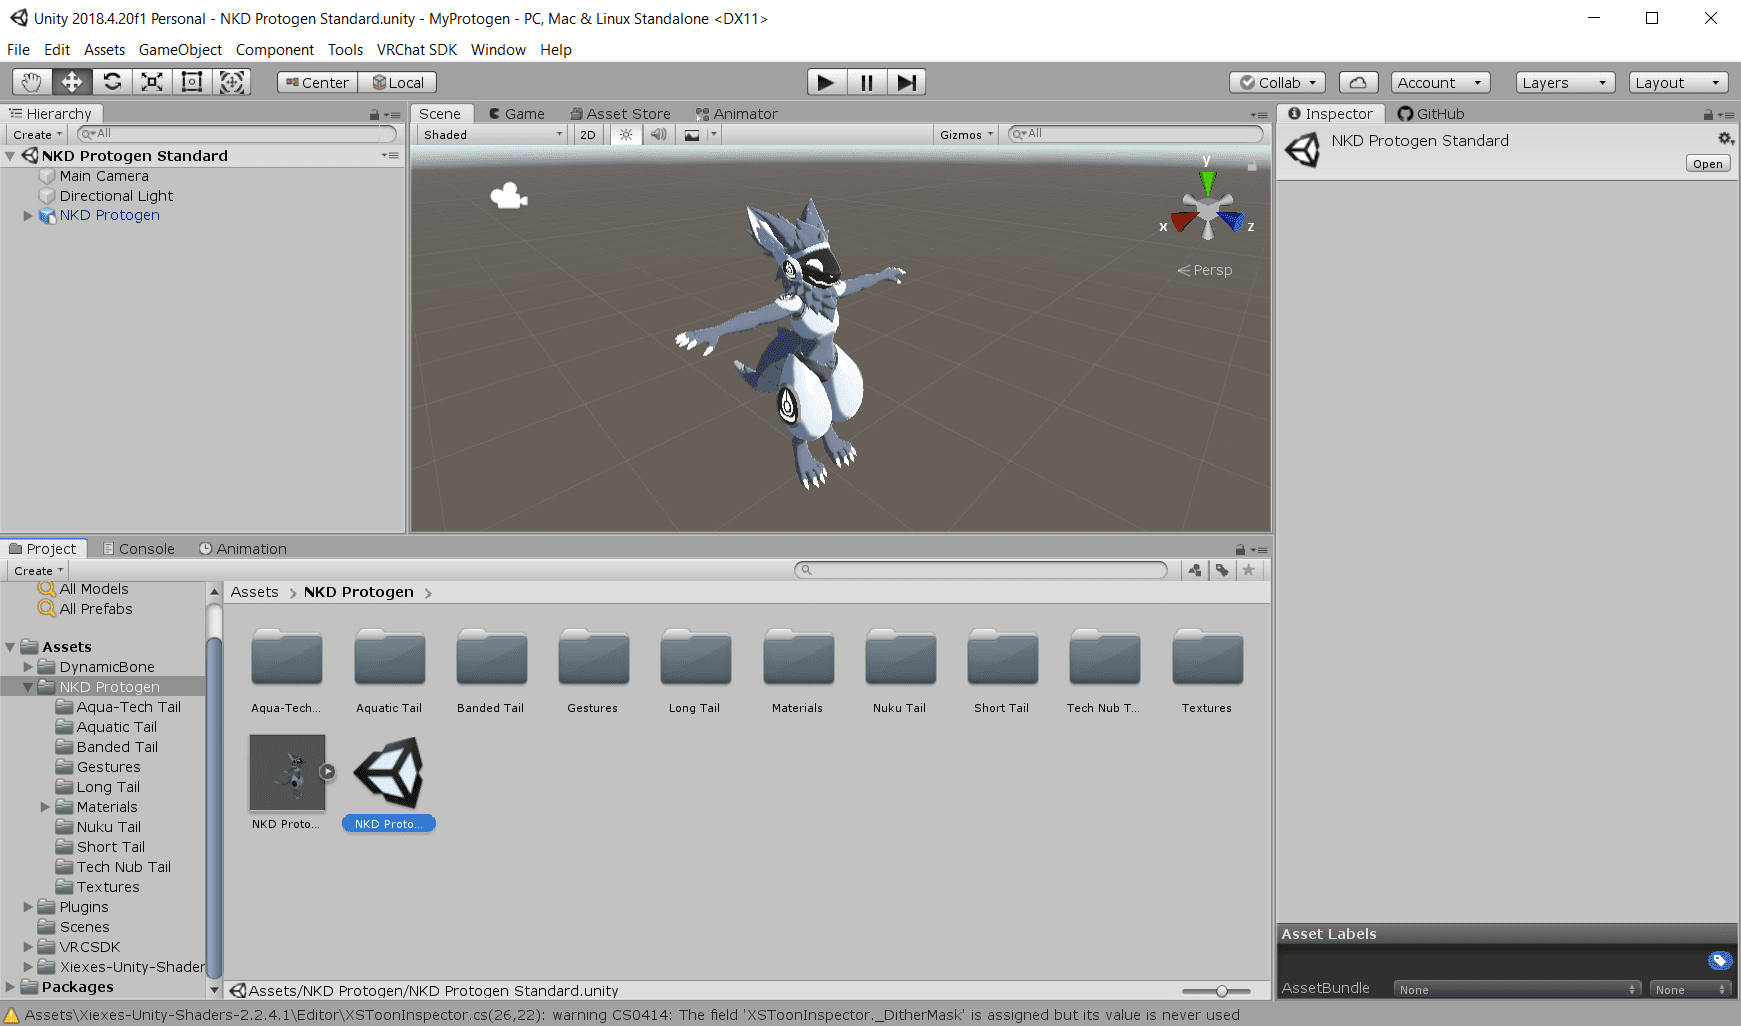
There are multiple variants of the Protogen with different tail models. Each variant is stored in a different folder inside of the "NKD Protogen" folder each with their own Unity scene file. You should try opening the other Unity scene files inside the other folders and figure out which variant you prefer.
Initial Avatar Configuration
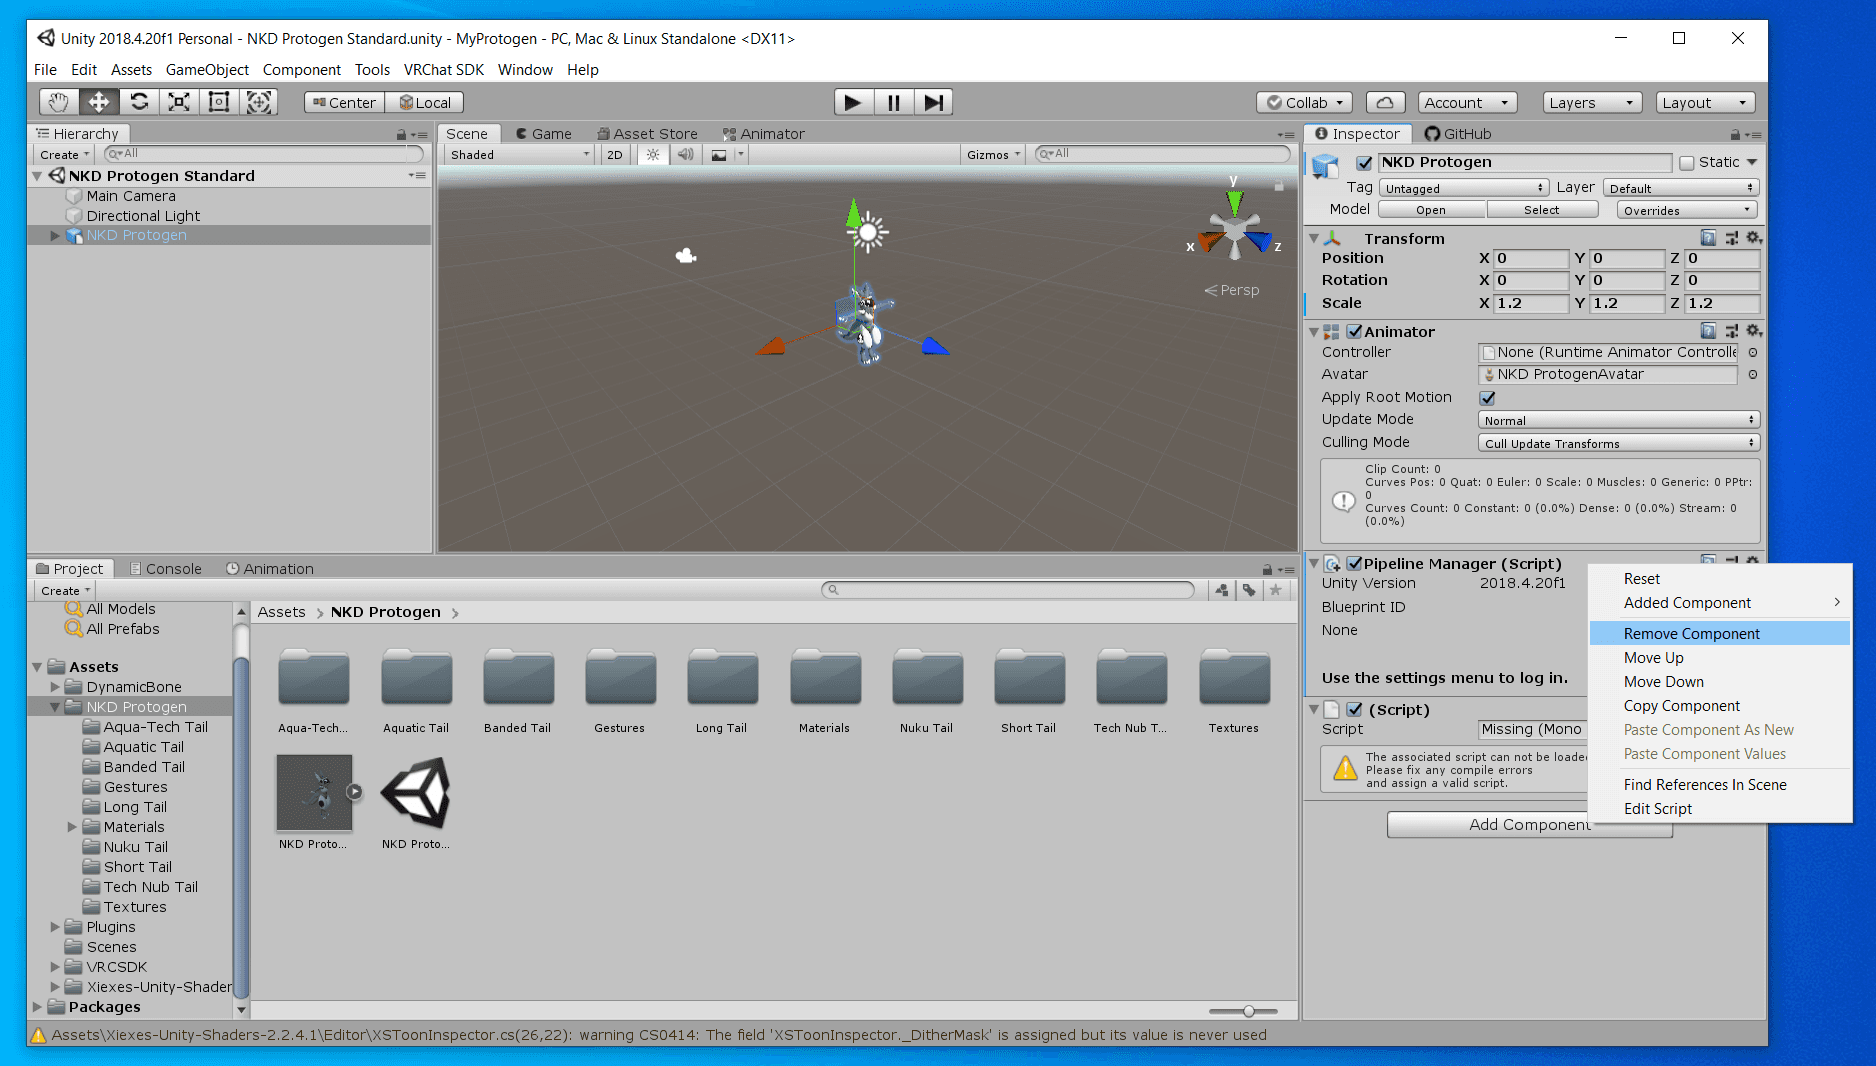
Once you have your chosen variant open, click on the Protogen prefab in the scene Hierarchy window on the left side. The Inspector window on the right side of Unity will now show info about the prefab. You should see four components in the Inspector window: "Transform", "Animator", "Pipeline Manager (Script)", and "(Script)". The prefab should have an avatar descriptor component configuring it for use by VRChat, but this avatar was created for an incompatible version of the VRChat SDK, so we'll need to set that up ourselves.
First, remove the "Pipeline Manager (Script)" and "(Script)" components by right-clicking on them and picking "Remove Component" on each.
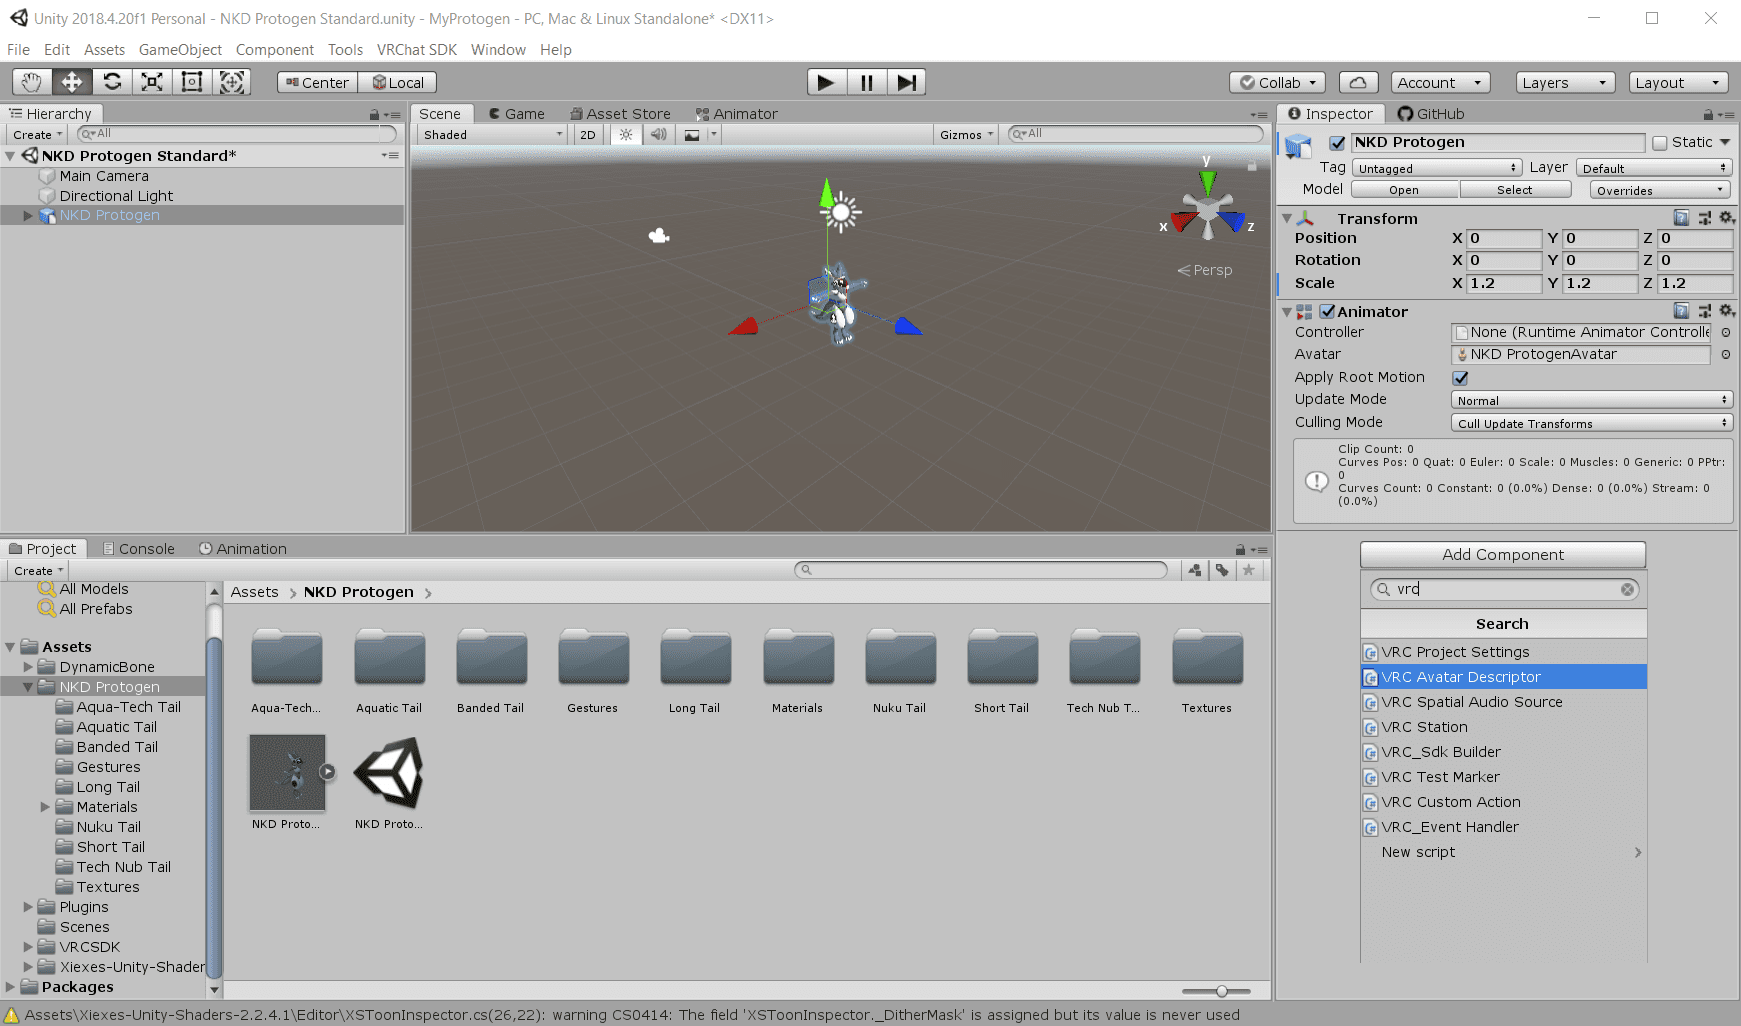
Then pick "Add Component", type "vrc" to filter the results, and pick "VRC Avatar Descriptor".
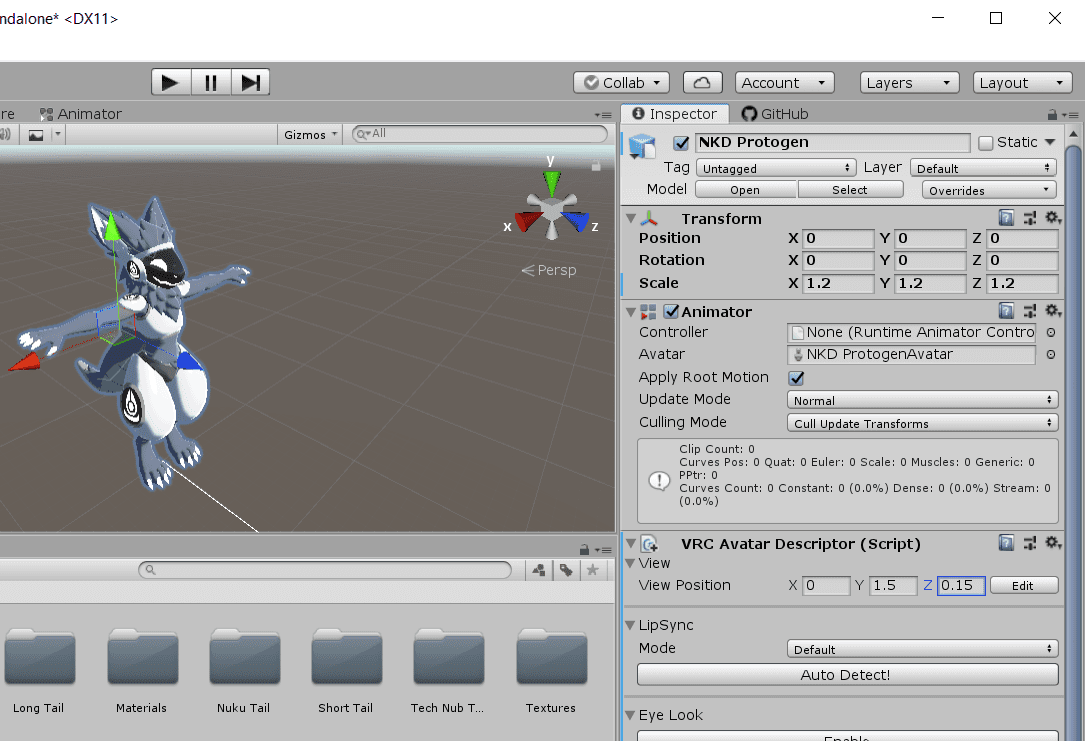
The first thing to do is to fix the View Position of the avatar. You can see the configuration for the View Position at the top of the new VRC Avatar Descriptor component. (If you click the "Edit" button, you can see a preview of where the view position is currently set, which isn't even inside of the protogen's head.) Set the View Position to X=0, Y=1.5, Z=0.15.
Aside: If you ever change the scale of the avatar from 1.2 (in the Transform component up above) to make the avatar shorter or taller, then you'll need to update the View Position proportionally. You can take the new scale value, divide by the old scale value, and then multiply that by each View Position coordinate. For example, if you change the scale to 1.3, then the new Y value should be 1.3 / 1.2 * 1.5 = 1.625 and the new Z value should be 1.3 / 1.2 * 0.15 = 0.1625.
Now in the LipSync section, leave Mode set to Default, and press the "Auto Detect!" button. That will configure all the visemes for the talking animations.
Eye Configuration
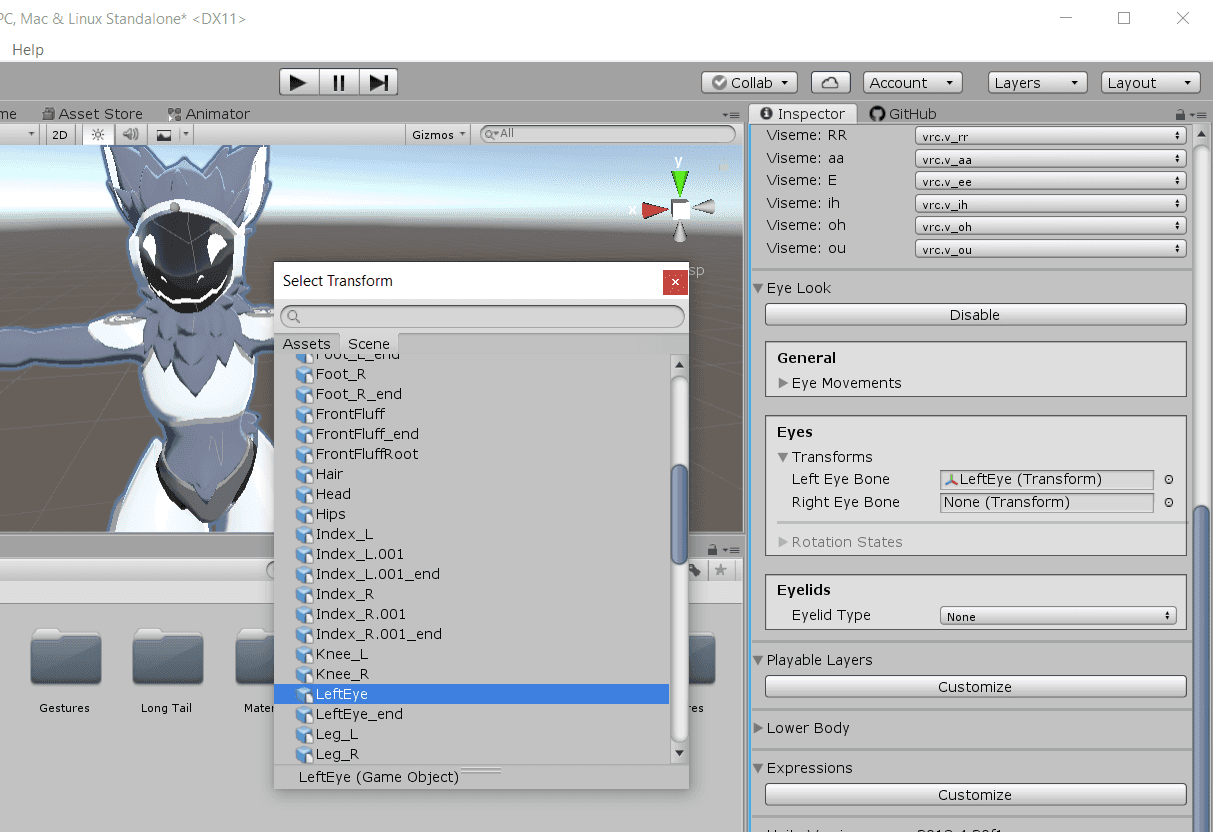
In the Eye Look section, press Enable. In the Eyes -> Transforms section, set At Eyes -> Left Eye Bone, press the circle button to the right of the field, and pick "LeftEye" in the list that comes up. Repeat for Right Eye Bone -> "RightEye".
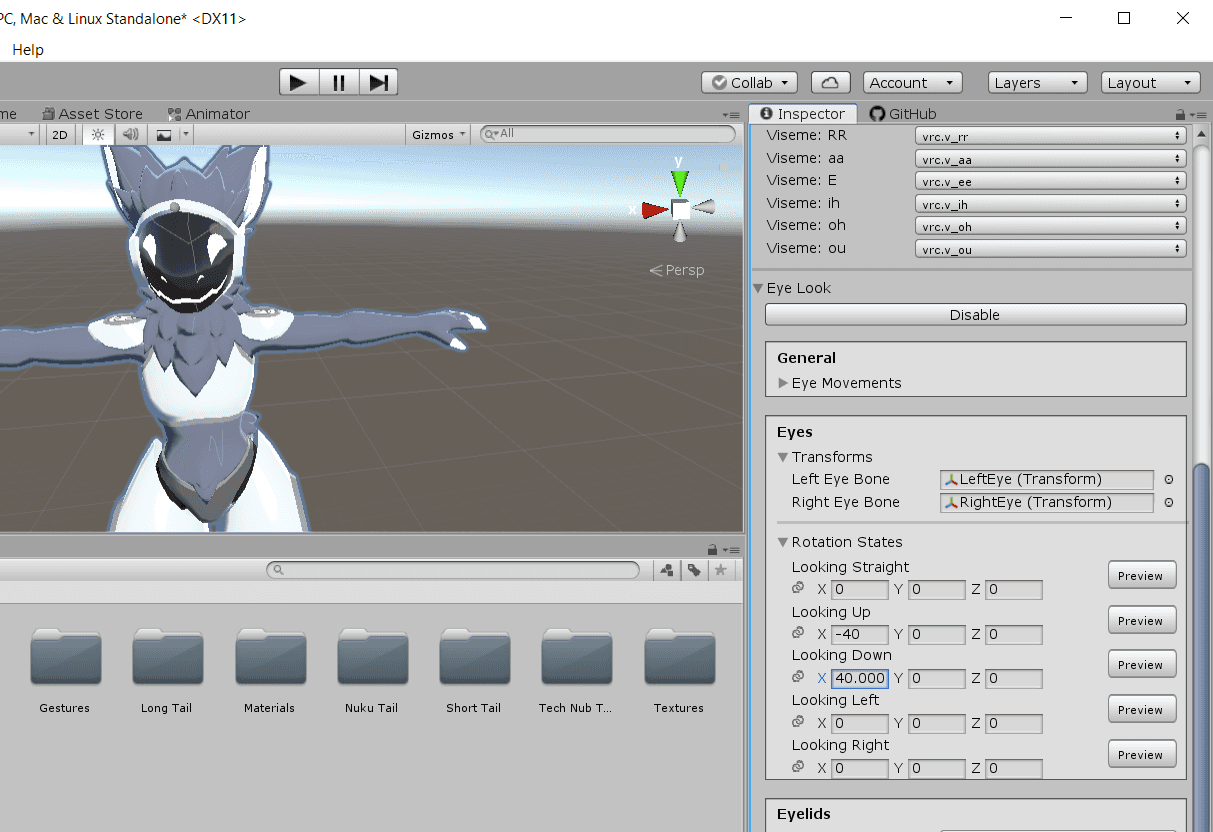
Expand the Rotation States section, set Looking Up X to -40, and Looking Down X to 40. (Don't worry if the 40 automatically changes to "40.00001".) The Protogen model doesn't have visible eye bones, so this won't seem to have a direct effect, but this is necessary for the eyelid lowering animations to work.
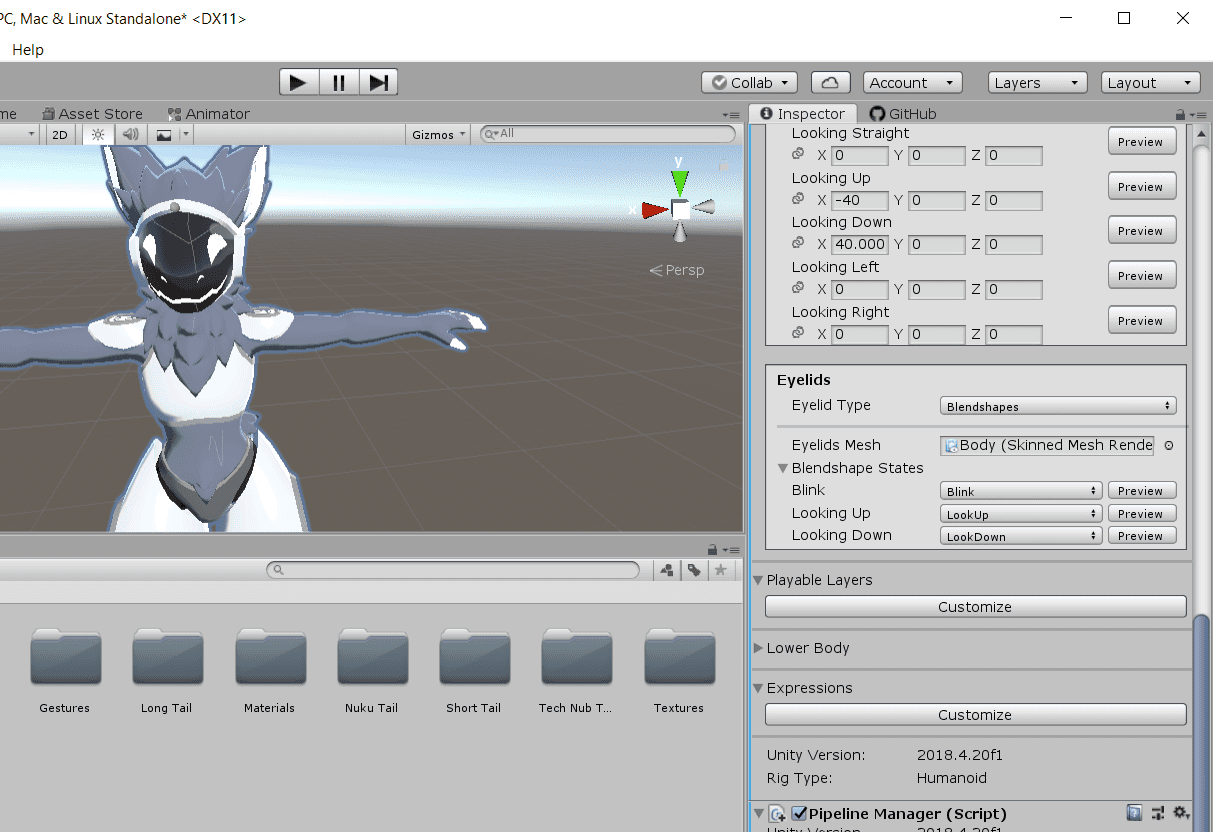
Next, set Eyelids -> Eyelid Type to "Blendshapes", and then set Eyelids Mesh to Body by clicking the circle next to it. In the Blendshape States section, set Blink to "Blink", Looking Up to "LookUp", and Looking Down to "LookDown".
We now have all the eye animations set up. The protogen will blink occasionally and sometimes slightly squint as you look around.
Adding Expressions Menu
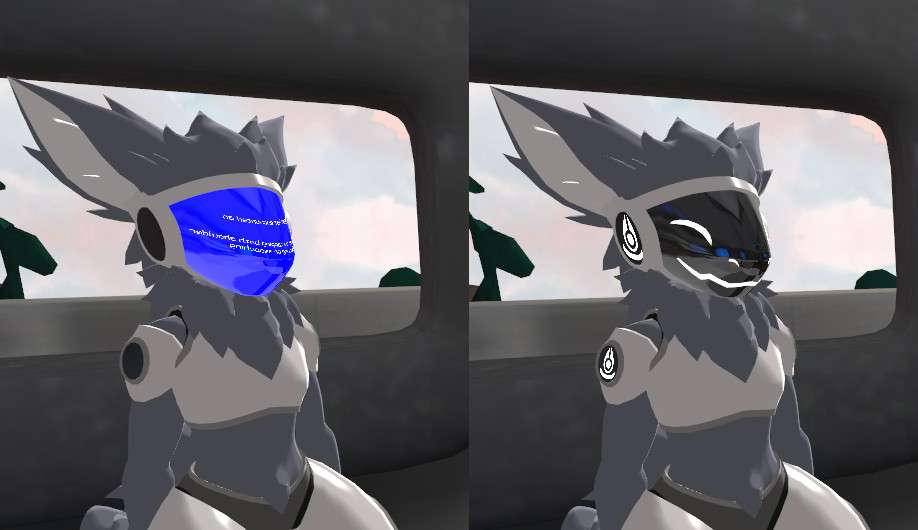
The protogen avatar has animations to show various moods (happy face, sad face, angry face, etc) and to make the visor show alternate textures (blue screen of death, exclamation mark, etc), but none of these are set up to be usable right now.
Go into your project's Assets/NKD Protogen folder, delete the Gestures folder, and then replace it with the Gestures folder from protogen3_gestures.zip.
Next, scroll to the Playable Layers section, press Customize, on FX press Default Non-Transform, and then drag the "FX" file from the new Gestures folder onto the value.
Scroll down to the Expressions section, hit Customize, and drag the "Main Menu" file from the Gestures directory to the Menu slot, and then drag the "Main Menu Parameters" file from the Gestures directory to the Parameters slot.

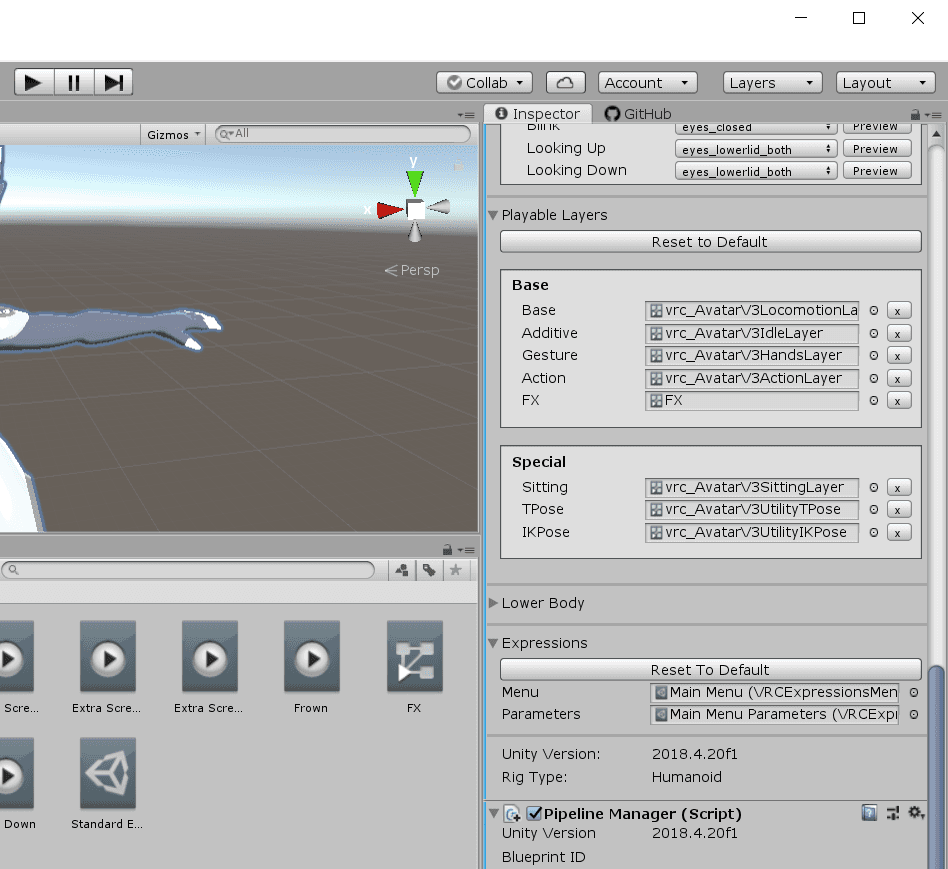
Next, as recommended in https://docs.vrchat.com/docs/vrchat-202041p3#sdk3---avatars, because we set one of the playable layers, we should set the rest of them. The default values for the layers are stored in the 3.0 SDK's examples directory. For each unset layer in Playable Layers -> Base and Special, click the "Default _" button to switch the layer away from the default runtime value, and then press the circle button next to the slot and pick the values shown in the following screenshot.
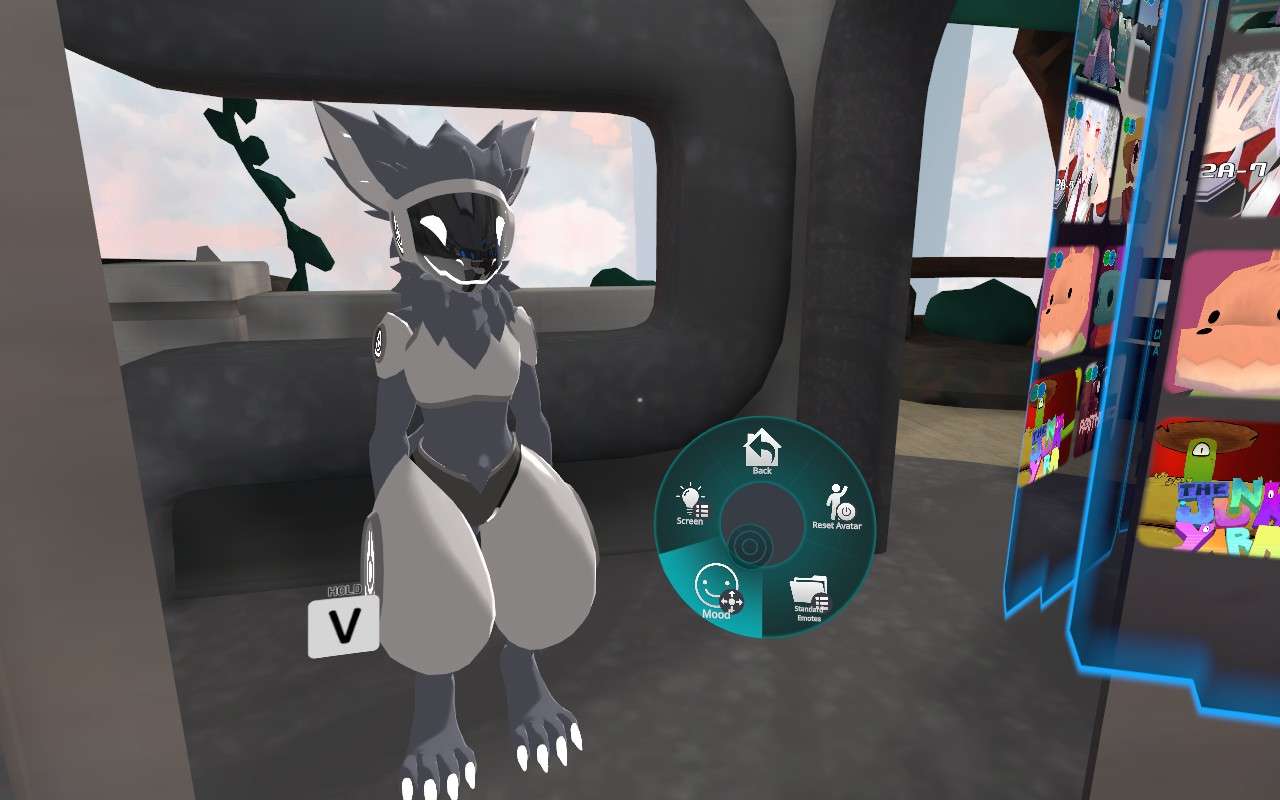
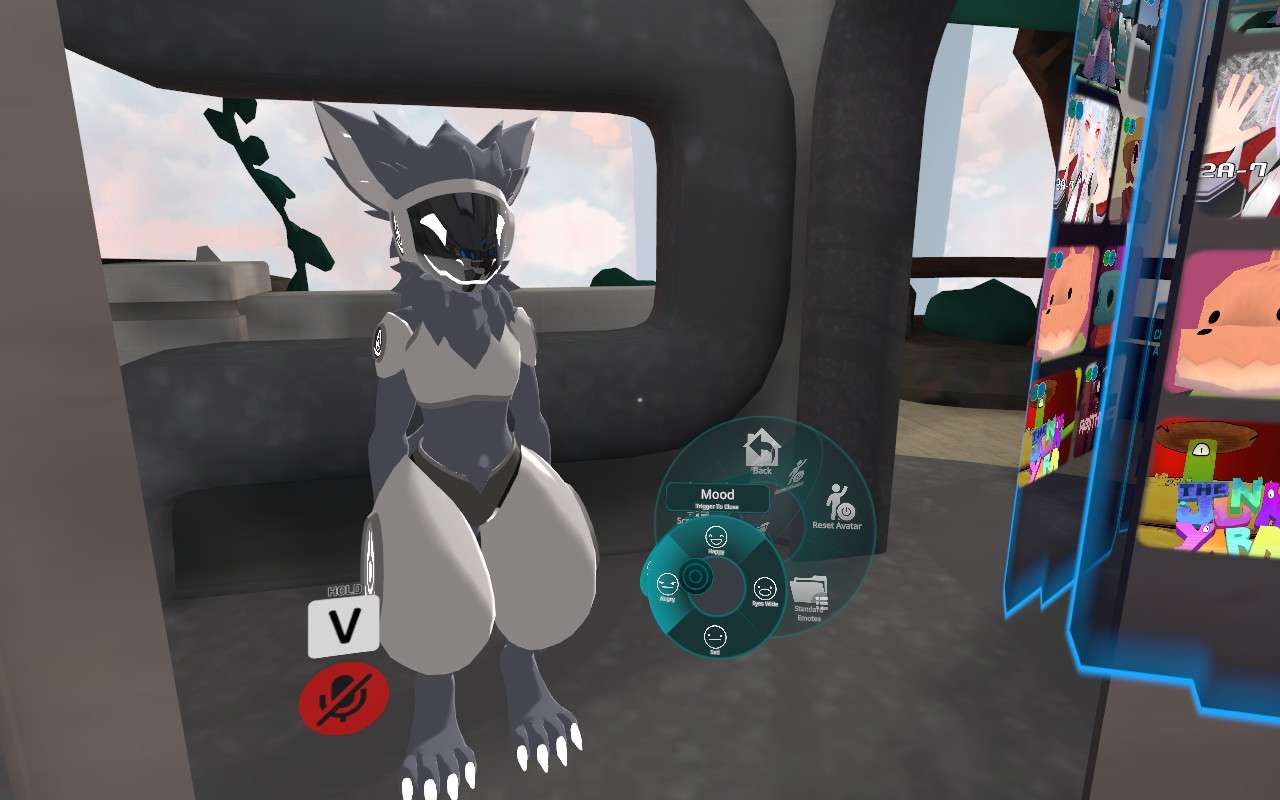
We're done now! The Protogen avatar now has working automatic eye animations and has an expressions menu allowing the face screen to be controlled. In desktop mode, you can open the expressions menu by hitting R, and in VR you can open it by holding the menu button for a few seconds. In VR, you can open a separate menu on each hand, navigate them separately, and keep them open until you want to use them without interrupting gameplay. If you close the menu (with R or the menu button), then your position in the menu will be remembered when you next open it, so you can prepare the menu for quick use later.
Testing
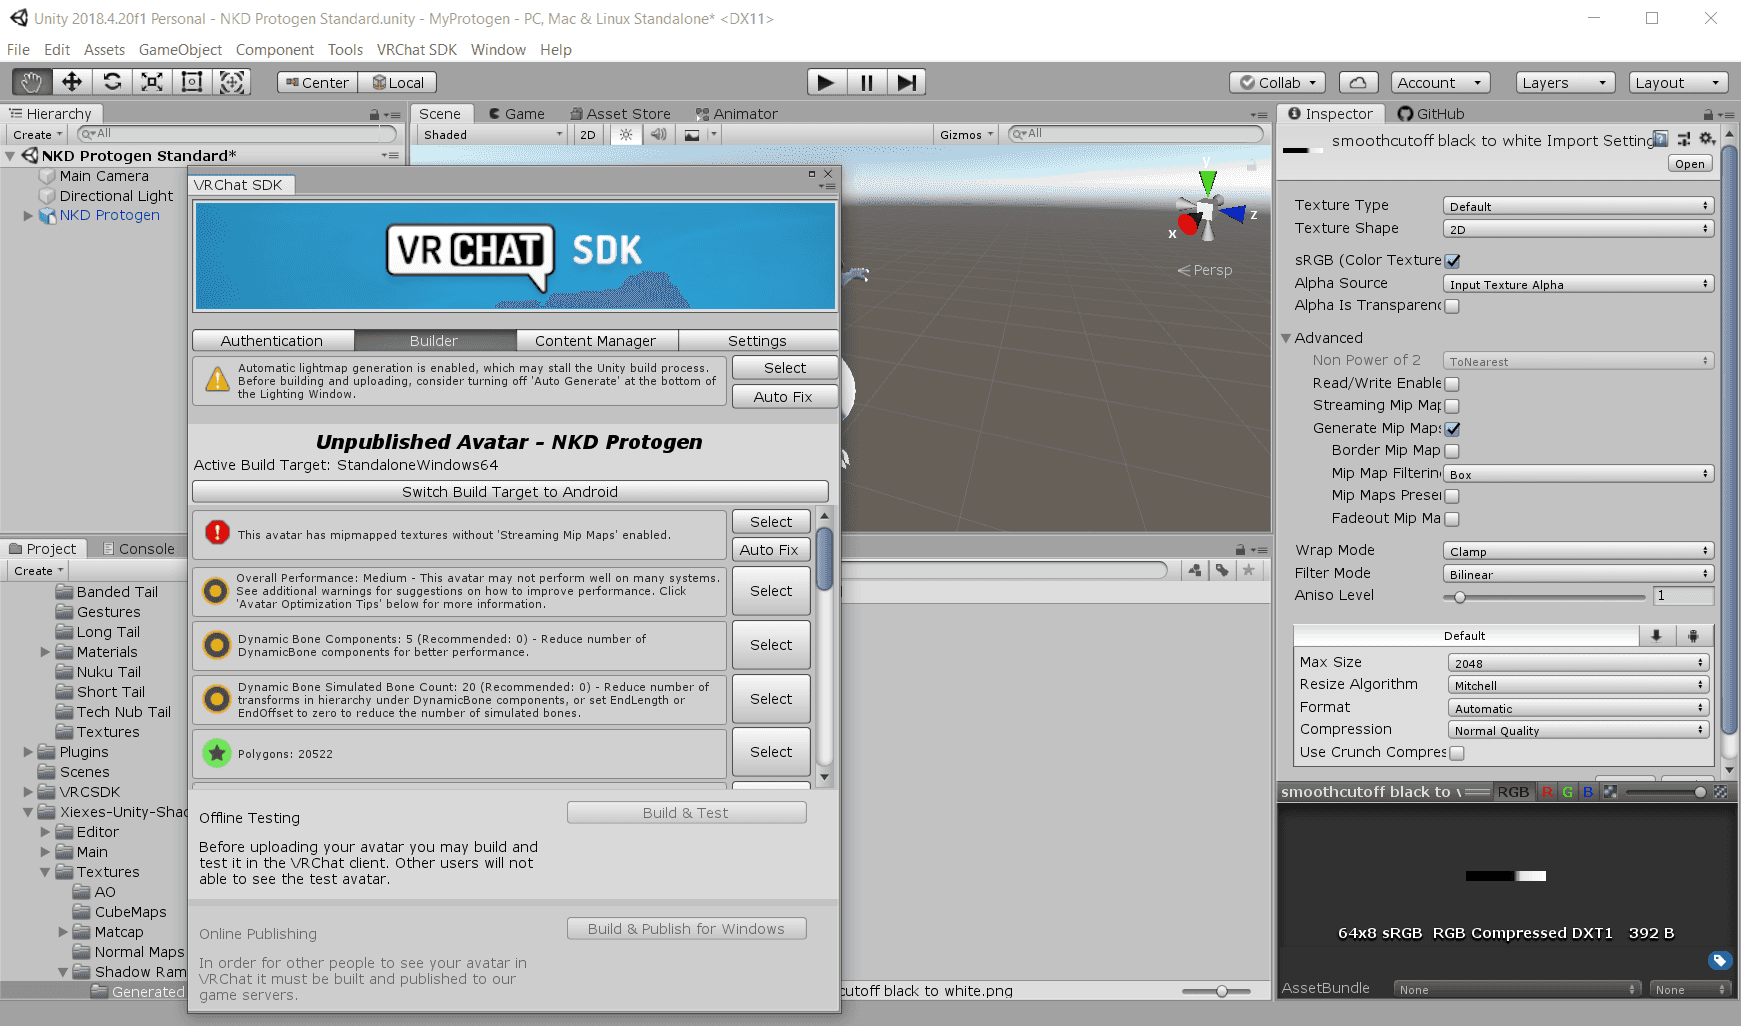
You can test out the avatar by running VRChat SDK -> Show Control Panel, signing in, Builder -> Build & Test. If you ever get an error about Streaming Mip Maps not being enabled, press the "Auto Fix" button to address that.
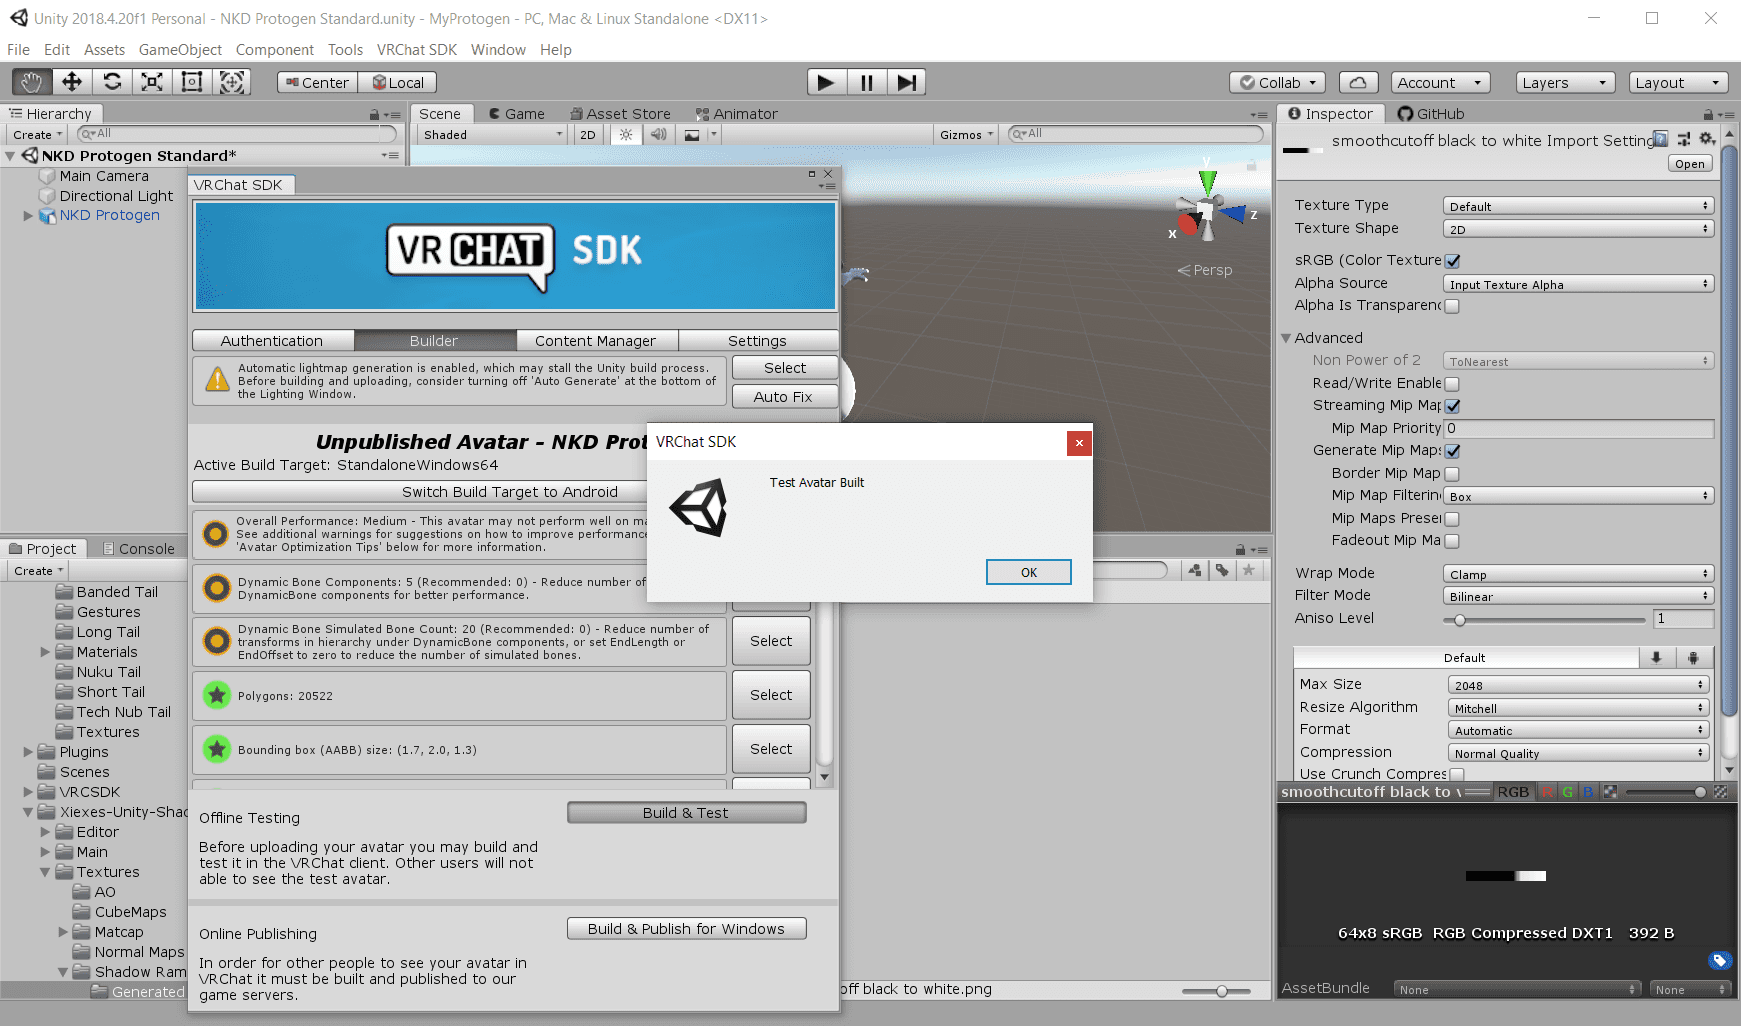
Once the test avatar is built, you can find the avatar available to use in VRChat on your computer. Other people are not able to see this avatar though. You need to hit publish before people can see the avatar. Test avatars will be in a separate "Other" section in the Avatars menu so you'll know which ones are test avatars.
If you make changes to your avatar and run Built & Test in Unity again, you do not need to restart VRChat to see new versions of the test avatar; you just need to reload it from the Avatars menu.


Hand Gestures
Note that there is one slight difference between this and how the original 2.0 avatar was set up: because the 2.0 SDK did not support custom expression menus, 2.0 avatars usually had any expressions set to trigger on specific hand gestures. This isn't very discoverable by users and frequently leads to VR users with actual finger-tracking controllers to unknowingly activate random gestures as they play.
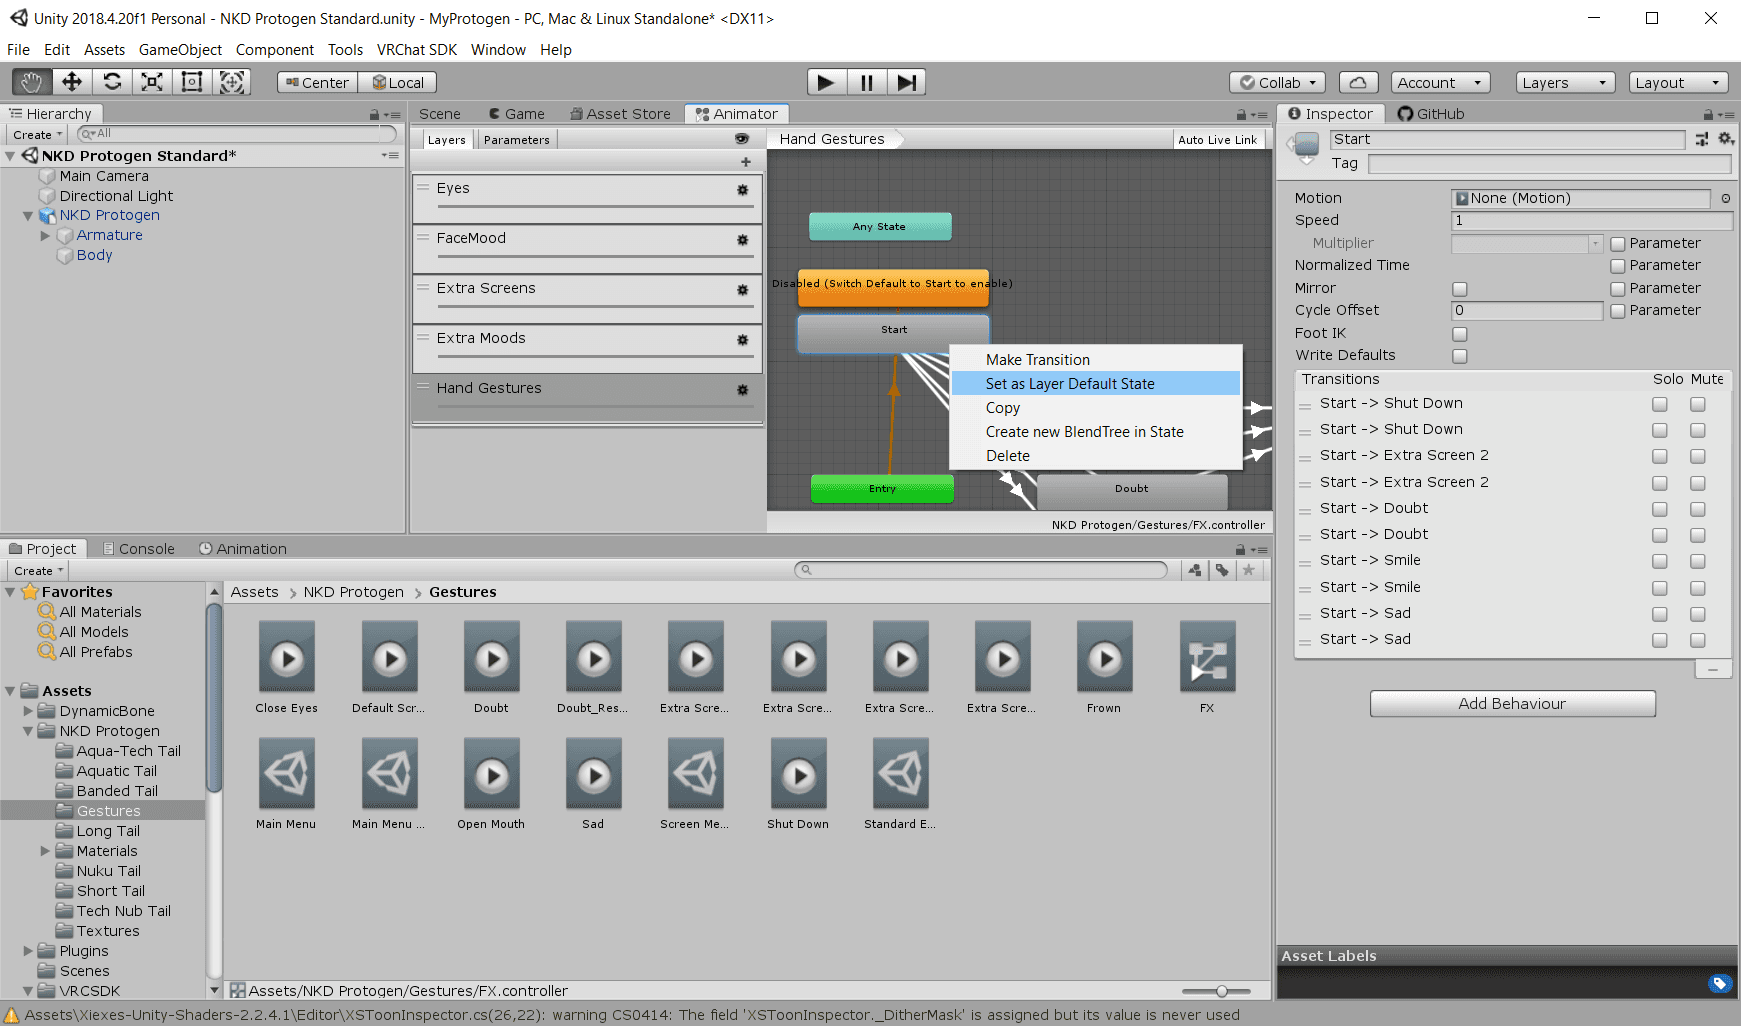
However, if you prefer the ability to activate expressions via hand gestures, it's possible to re-enable. There's a disabled layer ready to support hand gestures. If and only if you want to support this, then in the Project tab at the bottom of Unity, open Assets / NKD Protogen / Gestures, double-click the FX file, go to the "Hand Gestures" layer, scroll out in the Animator view so you can see the gray rectangle labeled "Start", right-click on it, and pick "Set as Layer Default State". The avatar now supports the same hand gestures as the original 2.0 release of the Protogen avatar did.
Gestures Explanations
This final section is completely optional to read! It's mainly relevant if you want to add new animations and new items in the expressions menu.
In the last section, we completed setting up the Protogen avatar, but there were a lot of interesting details skipped over when I told you to download the "protogen3_gestures.zip" file and use it instead of creating its contents yourself. In this section, I'll talk about how I made the contents of that directory and why.
The Gestures directory contains a bunch of .anim files (Extra Screen 1.anim, Shut Down.anim, etc.), FX.controller, Main Menu.asset, Main Menu Parameters.asset, Screen Menu.asset, and Standard Emotes.asset.
The .anim files specify animations for the avatar. All of these animations are very simple static animations that specify one or more blend shapes to activate on the model to do things like facial expressions. Some of these are slightly changed from the files from the original Protogen package for reasons I'll explain later.
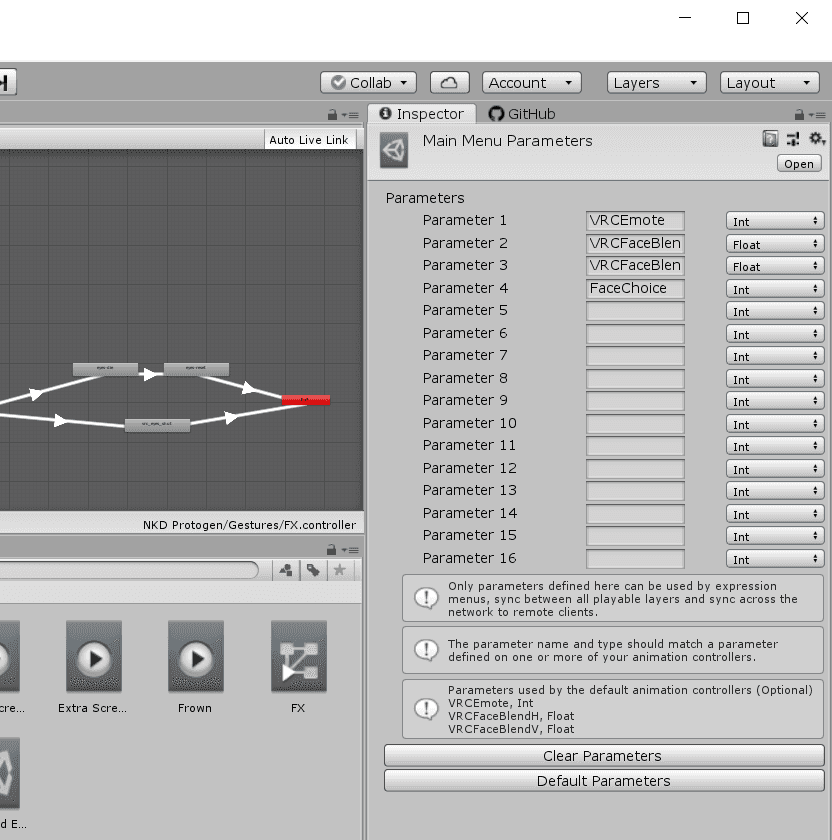
The .asset files are used to create the Expressions menu for the avatar. You can click on these files in the Project view at the bottom of Unity to view them in the Inspector on the right. You may remember that we set "Main Menu.asset" and "Main Menu Parameters.asset" to be used by the avatar. "Main Menu Parameters.asset" specifies parameters that the expressions menu is able to control. Specifying a parameter in this file allows it to be configured by the menus. These parameters are then acted on by the FX.controller which we'll see later.
The "Main Menu.asset" file specifies the main expressions menu. It has entries for the "Standard Emotes" submenu, the "Mood" button, and the "Screen" submenu. Each of the submenus link to a separate file; the "Standard Emotes" submenu contents are inside of the "Standard Emotes.asset" file.

Every entry in these menu assets is either a submenu which links to another menu asset, or it is some kind of option that lets the user control an animation parameter. The Mood entry in the above screenshot is a "Two Axis Puppet" menu which allows two parameters to be edited at once: VRCFaceBlendH and VRCFaceBlendV. Most other buttons merely toggle a specific parameter to a specific value.
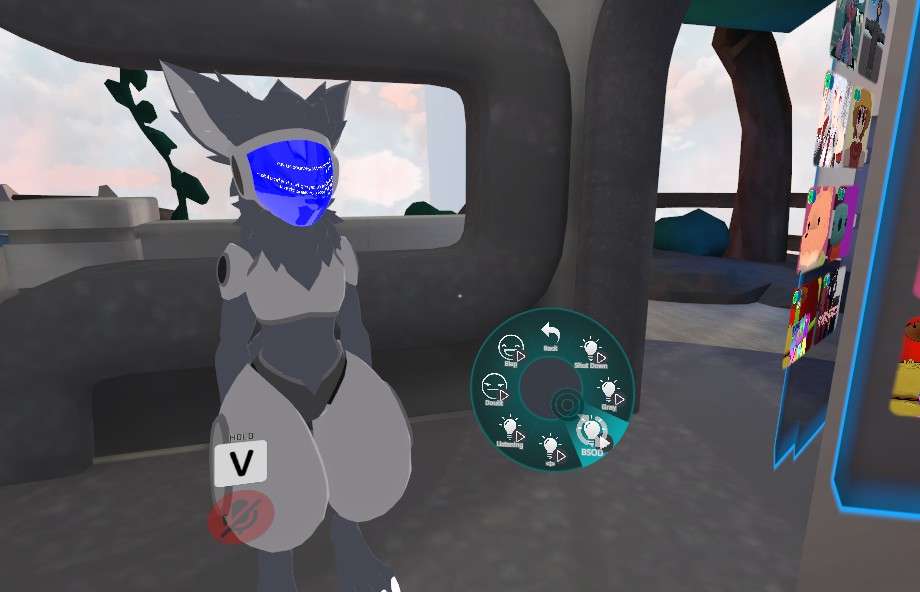
The "Standard Emotes" menu mimics the default VRChat expressions menu, and has buttons that set the value of the standard "VRCEmote" parameter. The "Screen" menu has buttons that set the value of the "FaceChoice" parameter, which is a parameter we made up to swap the face between extra screens and emotions. Everything in the Screen menu is mutually-exclusive, so using the same parameter for all of them is good. However, the Screen options and the Standard Emotes options may both be used at once (you can do the default dance animation while you have your face set to BSOD), so it's important that they used different parameters (VRCEmote and FaceChoice).
Last is the FX.controller file. This file was based on the file "vrc_AvatarV3FaceLayer.controller" from the VRCSDK's examples folder. This file is a Unity animator controller. It specifies how the avatar actually uses its animation parameters to decide what animations to play. To open it, you'll need to double-click on it in the Projects section.
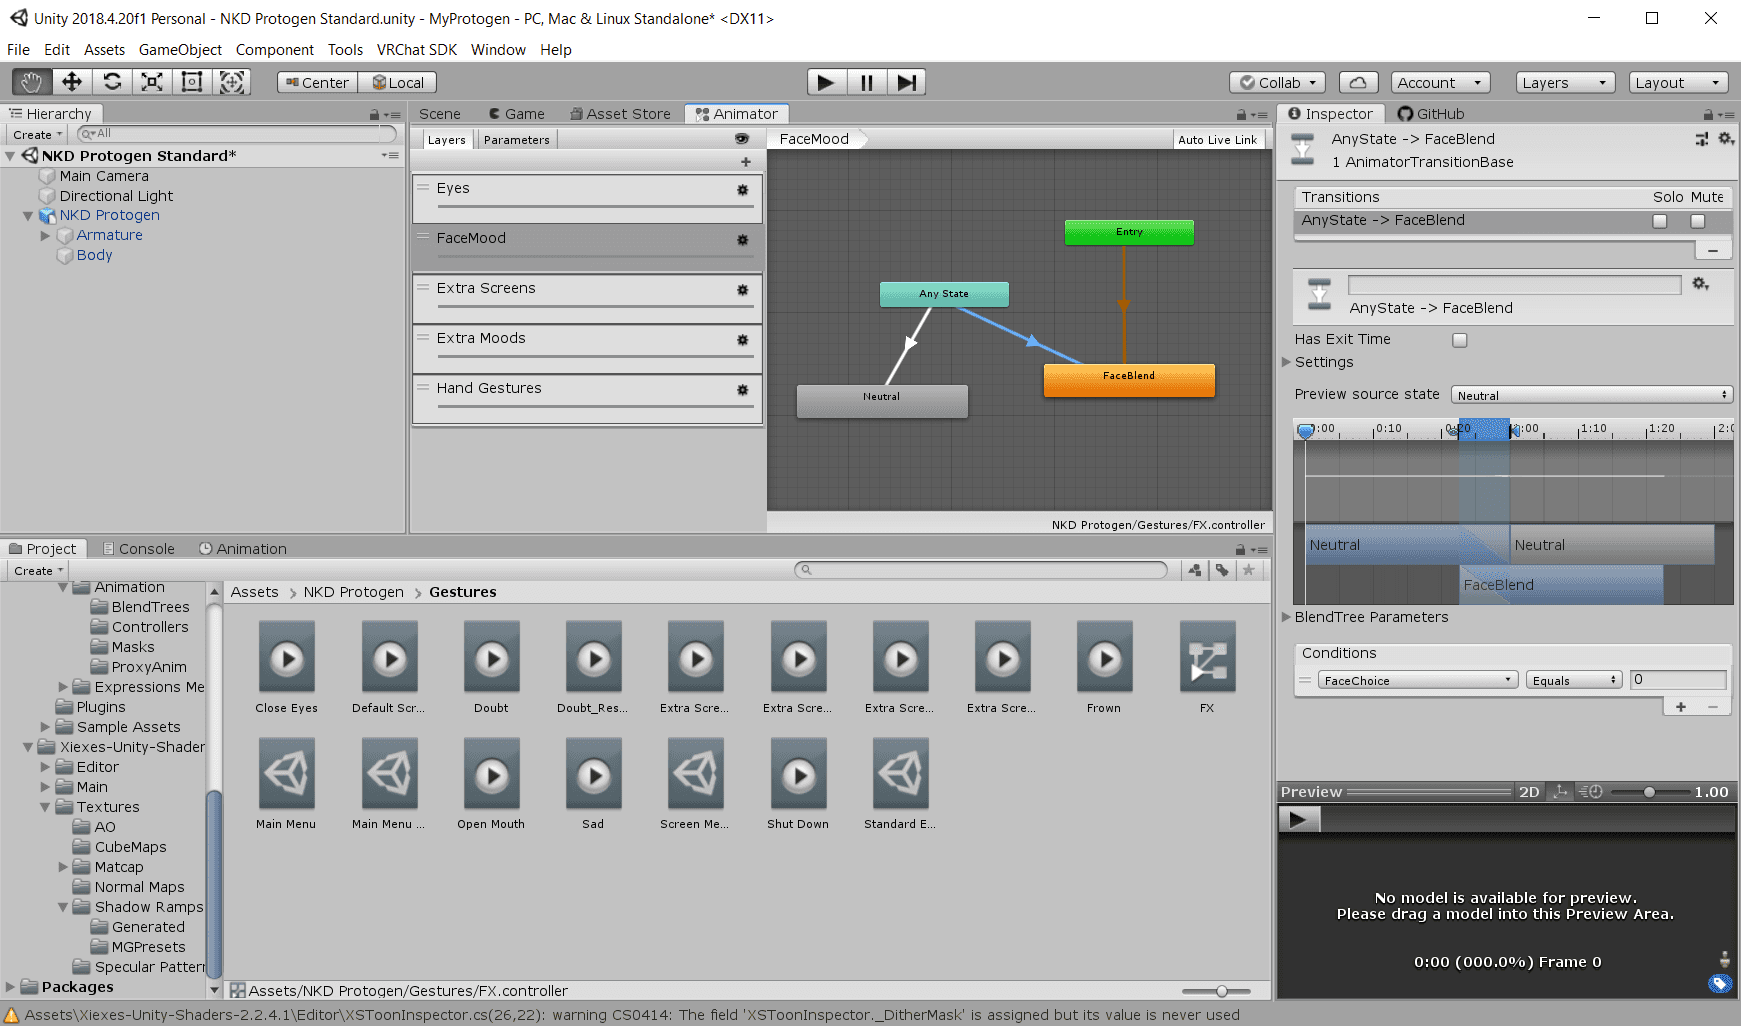
Animator controllers consist of layers, and each layer contains a flow-chart-like state machine. Each layer consists of multiple states (the rectangles) connected by transitions (the arrows). Both states and transitions may be clicked on, and each visible one has its own properties visible in the Inspector.
When the avatar is used in-game and the animator controller is running, every layer executes simultaneously. Each layer always has a single active state, and if the conditions in a transition leading away from that active state are fulfilled, then a new state will become the active one. Every transition has time-related properties and an optional list of conditions, and every state may specify an animation to activate.
As recommended by https://docs.vrchat.com/docs/avatars-30#write-defaults-on-states, all states here have the "Write Defaults" option turned off. If you create any new states, make sure to disable this setting on them, because Unity enables it by default. Some .anim files had to be updated to work with "Write Defaults" disabled. The "Shut Down" animation had to set the Extra Screens 1-4 blend shapes to 0, and a "Doubt Reset" animation was created to undo the "Doubt" animation. The different kinds of animations (the Mood menu, the extra screens, and the Doubt face animation) were put on different layers partly to simplify the ability to reset the animations.